

Easy Installation Guide
Step-by-Step Instructions
Ready to install your Lighthoof panels? Looking for more information to understand what needs to be done before you purchase? Look no further - we've got the easy installation guide right here for you to follow to make installing your Lighthoof mud management panels a breeze. So get ready to say goodbye to mud in just 5 easy steps!
Installing Lighthoof mud management panels is a simple process that creates a safer, healthier, and more beautiful environment for your horse. Let's walk through the steps and show you how you can be mud-free forever! Here's a high level overview, with each step detailed in full below so you can easily follow along. Looking for a printable version? Print out our easy installation guide here.
- First we’ll prepare the site.
- Then we’ll lay landscape fabric on the ground.
- Next we’ll stretch the Lighthoof panel and anchor it on the ground.
- We’ll pour gravel into the cells of the Lighthoof panel. Repeat those steps as needed for each Lighthoof panel, using special ties to connect them.
- Finally, we’ll compact the gravel to create a secure, long-lasting base. And you're done!
Watch our full, easy installation video now, or follow each step by step in detail right here on this page below the video. Still unsure how to install Lighthoof? Just contact us or find a retailer who can help today!
Installation Video
Watch us prepare a paddock, lay landscape fabric, install Lighthoof panels, and pour and compact the gravel. This video includes pro tips, step-by-step demonstrations, and of course adorable horses!
Step 1: Prepare the site for Lighthoof installation
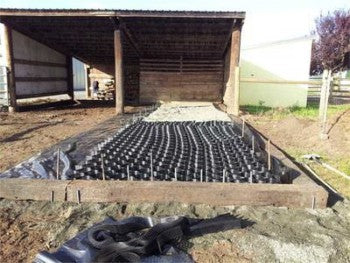
Lightly prep the area to be Lighthoofed.
- Remove any large rocks or debris and fence animals out temporarily.
- If desired, create sub-base drainage features such as a swale or slope.
- Create edge protection around the perimeter of your panels by laying a landscape lumber (railroad tie, etc) border or sloping the edges down by 4-5″ for a smooth transition.
Step 2: Lay out the geotextile fabric

Roll out geotextile fabric over existing muddy surface.
- Overlap the edges by 18″.
- We recommend a 6-8 oz non-woven geotextile.
- You can find geotextile fabric at your local building or landscape supply or you can order from Lighthoof.com.
Step 3: Stretch and stake the Lighthoof ground stabilization grid panels
Starting at the close end of your area, pre-stretch and stake out your first Lighthoof panel using temporary metal or wood stakes. Connect adjacent panels with the included EnviroLock ties.
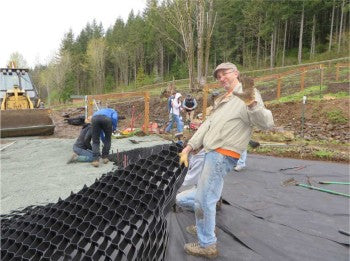

Step 4: Fill with gravel
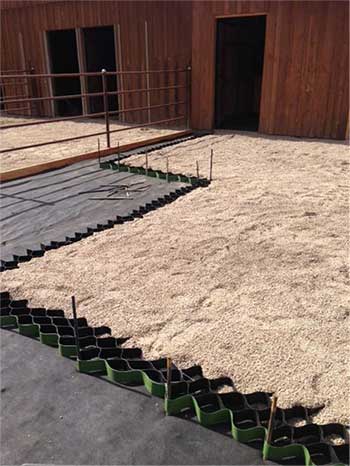
Fill the panel with gravel to about 1-2″ over the tops of the cells. Remove the stakes, and repeat steps 1-4 with another section.
Make sure the gravel you select is a fine crushed mix with angular, not rounded, edges. Pea gravel is not suitable.
NOTE: Panels can be driven on with a truck or tractor once filled with gravel, but be careful that there is enough over fill and/or compaction to prevent tires from digging in and crushing the tops of the cells.
Step 5: Compact the ground and be mud-free!
Compact the whole area evenly and thoroughly.

- Add more gravel if cells become exposed.
- A vibrating plate compactor from your local tool rental works best.
- For tips on perfecting gravel compaction, download the full installation guide.
- Once the base is compacted, you may wish to add another couple of inches of uncompacted gravel, sand, or any desired footing for a softer surface.
Ready to get started?
Fast, free delivery everywhere in the continental US.