
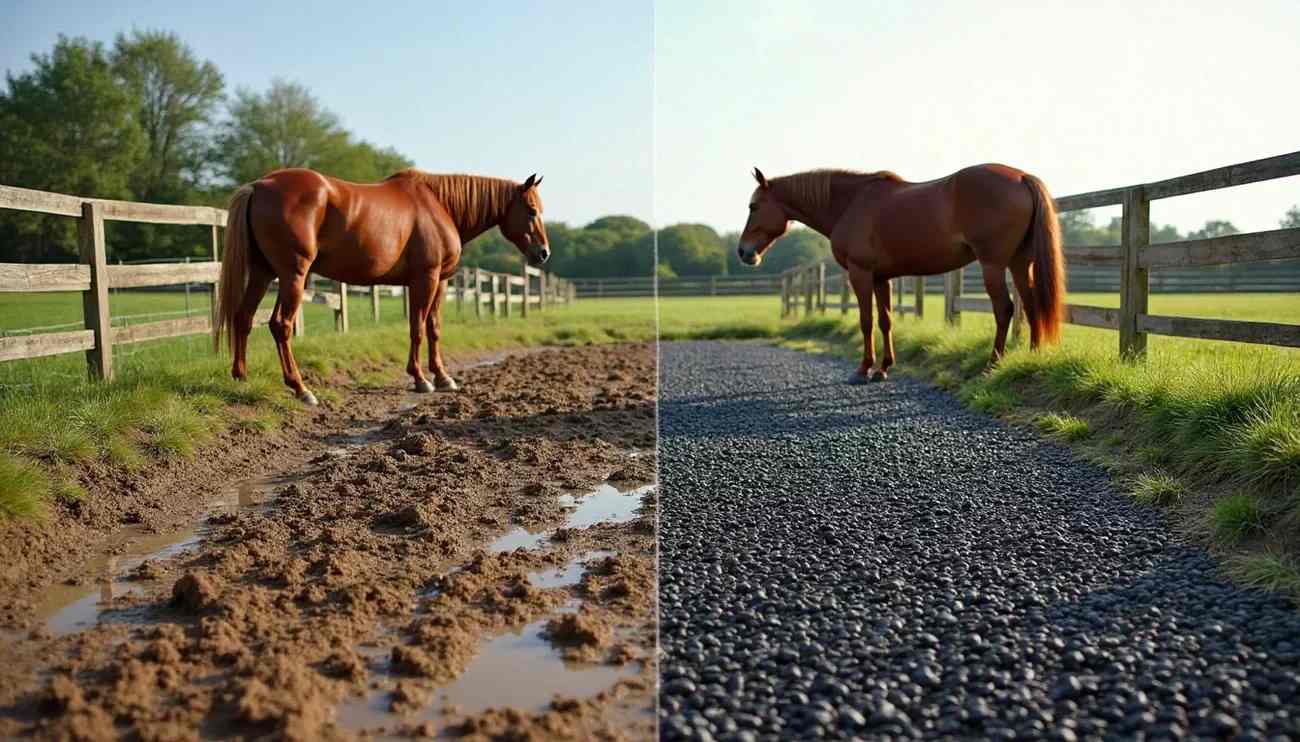
Ever mucked out a paddock that's ankle-deep in mud? Then you know exactly how a simple chore can turn into a back-breaking nightmare. And if you're wondering where all that mud comes from, here's a not-so-fun fact: your horse produces about 50 pounds of manure EVERY SINGLE DAY. That's right - all that poop is a major contributor to your mud problems!
For those of us with limited space, the challenge gets even tougher. Conservation experts say you need at least 400 square feet for a high-traffic area, but honestly, your horse would really benefit from 3-6 times that space to move around properly.
And let's talk about those traditional "solutions" that just don't cut it. I've watched countless horse owners dump load after load of loose gravel or bark into their paddocks, only to see it all sink into the muck within weeks. Then they're right back where they started - knee deep in mud and reaching for their wallets again.
This is where mud management isn't just about keeping things tidy - it's about your horse's welfare and your own sanity.
What most horse owners don't realize is that properly installed mud management panels can support MASSIVE weight - we're talking draft horses, tractors, and even trucks! Plus, they prevent erosion and protect your buildings and fence posts from damage.
With Lighthoof panels, you only need 4-6 inches of gravel - way less than the 8-34 inches needed for hard plastic grids. Even better, you can install them right over your existing ground without renting heavy equipment.
In this guide, I'll show you exactly how to fix your muddy paddock with methods that actually work for the long haul. No more temporary fixes. No more wasted money. Just dry, stable footing that your horses (and your back) will thank you for.
WHY IS YOUR PADDOCK TURNING INTO A MUD PIT?

Before you can fix your mud problem, you need to understand exactly what's causing it. After years of dealing with mud on my own farm, I've identified three major culprits that work together to create that perfect storm of muck and misery.
Horses Have Tiny Feet for Such Big Animals
Think about it - your thousand-pound horse is walking around on four hooves that each have only a few square inches of surface area. That's a LOT of pressure concentrated in a very small space! This creates what experts call "point pressure" that absolutely destroys the ground beneath [7].
"Horses exert a large amount of force and a small point of pressure. This is because they are large, heavy creatures with small, hard feet." [7]
Every single step your horse takes pushes down on the same spots, especially in high-traffic areas like gateways, around water troughs, and near feeders. That's why these spots are always the first to turn into barren patches and then transform into mud pits when the rain hits [2].
Your Grass Doesn't Stand a Chance
Healthy grass does amazing things for your paddock - it absorbs moisture, holds soil in place, and even helps filter all those nutrients from manure [3]. But once your horses have trampled an area repeatedly, that grass is history.
And don't forget - each of your horses is dropping about 50 pounds of manure EVERY DAY. When that manure mixes with your soil, it creates the perfect mud substance - slippery, heavy, and excellent at holding moisture [7]. It's basically a recipe for mud pie.
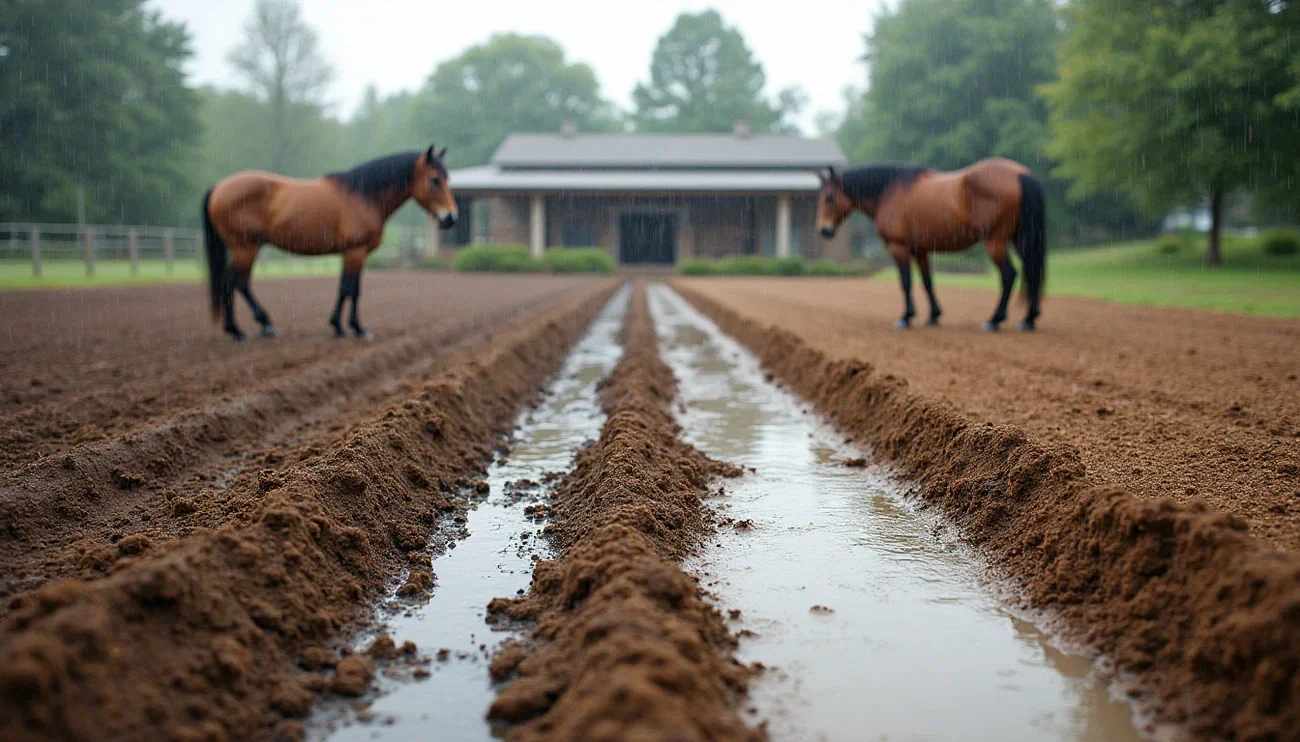
Water Has to Go Somewhere
Remember the golden rule of drainage: water runs downhill. When hoof traffic compacts your soil, water can't soak in properly. Instead, it just sits on top, creating those lovely puddles your horses love to splash through [3].
It doesn't take much rain to create a problem either. Just a quarter inch of rainfall dumps about 6,789 gallons of water on a single acre [4]. Add in runoff from your barn roof, driveway, or nearby hills, and you've got serious water issues.
"Runoff from driveways, parking areas, hillsides, and even slight slopes can add significantly to an existing problem of increased erosion and mud collecting in equine confinement areas." [5]
When you put it all together - concentrated hoof pressure + daily manure deposits + poor drainage - you've got the perfect recipe for a mud disaster. But don't worry! Now that we understand the problem, we can tackle it head-on with proper mud management solutions.
BEFORE YOU BREAK GROUND - PLAN YOUR MUD SOLUTION!

If you've ever jumped right into a mud fix without proper planning, you know exactly what happens - you end up with a temporary solution that fails as soon as the next rain hits. I've made this mistake more times than I care to admit!
Water Always Wins - Plan Your Drainage First
Remember the golden rule of drainage: water runs downhill. That's it! It's not rocket science, but you'd be surprised how many horse owners forget this simple fact when setting up their paddocks.
Start by watching where water flows during a typical rainstorm. If water is pooling around gates, feeders, or shelter entrances, addressing your horse paddock drainage before installing footing will dramatically improve long-term results.
"Lighthoof panels prevent mud from forming even with standing water, but planning drainage before installation creates a dry paddock year round."
For your paddock to drain properly, you need at least a 2-3% slope away from barns and high-traffic areas. That's not much - just 2-3 feet of drop for every 100 feet of distance.
Many people ask if they should use a French Drain in this situation, and the answer from multiple horse farm design experts is NO! French drains clog easily with horse hair, manure, and other debris, making them practically useless in paddock settings.
Creating Your Heavy Use Area
Your Heavy Use Area (HUA), also called a dry lot or sacrifice area, is a critical part of any mud management plan. If you're building one from scratch, our Sacrifice Area Guide walks through sizing, placement, footing selection, and maintenance considerations.
Pick a spot that:
-
Sits on higher ground if possible
-
Is convenient to your barn for feeding and care
-
Allows horses to see their buddies (horses get stressed when they can't see their herdmates)
-
Stays away from natural waterways to prevent runoff contamination
Size matters a LOT here. Each horse needs at least 400-600 square feet of space. For two horses, that's roughly a 20' x 40' area minimum for horses that get along well together. Remember, horses need room to move, turn around, and get away from each other when needed.
What You'll Need to Get the Job Done
I've installed enough mud management systems to know exactly what you'll need:
-
Basic tools: Shovels, rakes, and wheelbarrows
-
Measuring tools: A long tape measure and something to check your slope
-
Compaction equipment: You can rent a plate compactor or use a hand tamper for smaller areas - we recommend the plate compactor.
-
Cutting tools: Heavy-duty scissors or a utility knife to trim panels
For materials, you'll need:
-
Geotextile fabric (don't skip this - it's what keeps your gravel from disappearing into the mud during installation)
-
Gravel (3/8" to ½" angular crushed stone works best)
-
Lighthoof panels or similar cellular grid system
-
Zip ties to connect your panels
Getting these materials ready BEFORE you start digging will save you countless headaches. Trust me on this one - I've learned the hard way!
And remember, this isn't just about stopping mud - it's about creating a healthy space where your horses can thrive. With the right planning, you'll build something that lasts for years instead of weeks.
FINALLY - LET'S GET THOSE PANELS INSTALLED!

Now we're getting to the good part - actually fixing your mud problem! Installing mud control grids is where your planning pays off and your paddock starts its transformation from muck pit to solid ground.
Why Lighthoof panels beat temporary solutions hands-down
Let's face it - mud isn't just unsightly, it's downright dangerous for your horses.
"Mud may cause a variety of problems, including scrapes and hoof abscesses. It may also raise chances of ligament strain or rupture." [6]
What makes these panels so special is how they lock gravel in place through interconnected cells. This creates a stable platform that water can flow through while preventing mud formation. Plus, these systems are TOUGH - some can handle up to 11,200 pounds per square foot [7], meaning your tractor won't sink when you're delivering hay in winter.
Picking the right gravel is CRUCIAL
I can't stress this enough - your gravel choice makes or breaks your installation.
Don't just grab any old gravel! You need small, angular crushed stone with fines that will compact properly [8]. The ideal size is 3/8" minus [8]. Never use sand or pea graveld within your Lighthoof panels - they simply won't provide the stability your horses need. You can, however, add sand or pea gravel to the top of your panels to create some soft surface areas with comfort and hoof benefits!
For Lighthoof panels, you'll need about 1-1.75 cubic yards of gravel per panel [8]. You can find a local sand or gravel yard to deliver your aggregate, and remember, Lighthoof offers free shipping on Lighthoof panels of any quantity right to your farm!
Before you lay a single panel, put down geotextile fabric first [9]. This step prevents your gravel from disappearing into the ground during installation - this allows you to install your panels without a gravel sub base even if the ground underneath is wet.
Connecting panels the right way
Connect your panels using zip ties through each cell junction, creating one continuous mat [9]. Cut off the ends or tuck them under the panel so they don’t stick up through the gravel.
For the edges of your installation (especially where curious horses might investigate), protect them with railroad ties or pressure-treated timbers [10]. Some professional installers even secure cells to border timbers using sheet metal roofing screws for extra stability [10].
Don't make these common mistakes!
The biggest reason these systems fail? Not following the installation instructions exactly as written [10].
I've seen it happen before - people use rounded stones like pea gravel as fill material (they never firm up to create a solid base) [10], or they skip using a vibrating plate compactor to pack the gravel properly [10]. These shortcuts might save you an hour now, but they'll cost you weeks of frustration later.
When installed correctly, these mud management panels create a foundation that keeps your paddock dry for years while dramatically improving your horses' hoof health. Trust me, the effort is worth it!
KEEPING YOUR PADDOCK MUD-FREE FOR THE LONG HAUL

Image Source: Equinox Racing
Installing mud management panels is just the first step. Keeping your paddock mud-free means staying on top of maintenance - otherwise, you'll get new mud forming on top of your beautiful Lighthoof installation!
Pick up poop. Seriously. ALL the poop.
The absolute #1 thing you can do to maintain your mud-free paradise? Get out there and clean up manure REGULARLY. I pick up waste every 1-3 days to prevent nutrient runoff and reduce bacteria that lead to hoof problems. This isn't just about aesthetics - it's about protecting your investment and your horse's health.
"Daily picking of manure from the paddock will help maintain mud-free conditions and is part of normal maintenance."
While you're out there picking manure, take a few extra minutes to rake your paddock surface to keep it level. And don't forget to remove uneaten hay! That stuff breaks down into organic material that holds water like a sponge and contributes to - you guessed it - more mud.
Seasonal check-ups prevent major headaches
Think of your paddock like a car - regular maintenance prevents expensive breakdowns. Before heavy rain seasons hit and after major storms blow through, do a thorough inspection of your whole system. Spring and fall are perfect times to assess how well water is moving through your paddock.
Pay special attention to those high-traffic zones around water troughs and feeding stations. These areas almost always need a bit of additional material every 1-3 years to keep the base covered in areas where gravel gets tracked away or sticks to manure being removed. That said, Lighthoof works just fine to stabilize the base even when the tops of the cells become exposed over time. Plus, the cells are soft and flexible and aren’t slippery and won’t cut a horse. But… they do catch on your manure fork and make mucking harder, so they are worth covering back up every so often.
When to add more gravel (with Lighthoof, it’s not much!)
Even the best-installed mud management systems need a refresh now and then. Every few years or as needed, add a thin layer of appropriate material to spruce up your paddock surface. Generally, you'll need to replenish gravel every 3-5 years depending on how many horses you have and how they use the space.
Here's a pro tip: for proper compaction, your material should be just moist enough to form a "snowball" in your hand before you compact it. After compaction, the surface should resist when you try to dig into it with your boot.
Keep an eye on those hooves!
Your horse's hooves tell the truth about your mud management success. Check them daily for:
-
Thrush (that nasty black, smelly stuff in the hooves)
-
Pastern dermatitis (those raw, irritated "scratches")
-
Cellulitis (hot, tender swelling in the legs)
"Horses exposed to muddy environments should be checked daily for signs of thrush, pastern dermatitis and cellulitis. These conditions are perpetuated by wet environments."
For mild cases of pastern dermatitis, clean the area daily, dry it thoroughly, and apply your favorite topical treatment. But let's be honest - the BEST treatment is prevention through proper mud management that keeps your horse's feet dry in the first place!
Lighthoof users report a significant decrease in mud-related health conditions and often share compliments from their farriers about the state of their horses’ hooves!
GET YOUR HORSES OUT OF THE MUD ONCE AND FOR ALL
Battling mud isn't just annoying - it's a constant drain on your time, money, and energy. Throughout this guide, I've shared the methods that actually work instead of those temporary band-aid solutions we've all tried (and watched fail).
The truth is, the difference between a muddy nightmare and a functional paddock isn't how much money you throw at the problem. It's about understanding what's really happening and taking smart steps to fix it.
Those tiny hooves carrying your horse's entire weight? They're like little mud-making machines when combined with all that daily manure and poor drainage. But with the right approach to mud management panels and proper gravel selection, you can transform those problem areas into surfaces that stay dry and stable year after year.
Daily maintenance is absolutely critical though. I can't stress enough how important it is to pick up manure regularly. Trust me, you don’t want to fix your mud problems only to let organic matter build up on your mud-free paddock base.
Your horse's health will thank you too. I've seen countless cases of thrush, scratches, and other nasty conditions clear up simply by getting horses onto dry footing. That investment in proper mud management pays for itself not just in reduced maintenance costs but in fewer vet bills and healthier, happier horses.
Remember that successful mud control isn't just about one solution - it's about creating a thoughtful, low-maintenance process. You need to address drainage, install the right stabilization system, AND keep up with manure maintenance routines. It takes some effort upfront, but the long-term benefits far outweigh the ongoing battle with mud.
Whether you're managing a single backyard horse or a whole boarding facility, these techniques can transform your muddy paddocks into functional, healthy environments where your horses can thrive.
It's our goal at Lighthoof to get every horse in the world out of the mud once and for all - and now you have the knowledge to make that happen on your farm too!
References
[1] - https://www.lighthoof.com/blogs/blog/fixing-horses-mud-problem
[2] - https://extension.psu.edu/construction-of-equine-all-weather-paddocks-for-mud-free-management
[3] - https://extension.umn.edu/horse-pastures-and-facilities/managing-mud-horse-farms
[4] - https://madbarn.com/managing-mud-on-horse-farms/?srsltid=AfmBOoouq4rAowLs21YH6GQD_J04GEsGZVJeSIhH712un7wf9ladIoae
[5] - https://thehorse.com/1121662/dealing-with-mud-and-flooding-on-horse-properties/
[6] - https://www.greening-solution.com/horse-paddock-grids/why-do-we-need-to-use-horse-paddock-mud-control-grid/
[7] - https://www.paramountmaterials.com/products/horse-paddock-mud-control-grid?srsltid=AfmBOopzdHc8sXc0tWt0spDgchWtPZZPSADUNIUDMkZzmgGYo4umroOG
[8] - https://www.smartpakequine.com/pt/lighthoof-mud-management-panels-26850?srsltid=AfmBOoqdOu8IQu6f1jQ33kFZoqqJ9bmVBzj6cU5C766SumA4sPwrqE1l
[9] - https://www.lighthoof.com/
[10] - https://www.lighthoof.com/blogs/blog/how-not-to-fail-at-fixing-your-paddock-mud

Leave a comment
This site is protected by hCaptcha and the hCaptcha Privacy Policy and Terms of Service apply.