

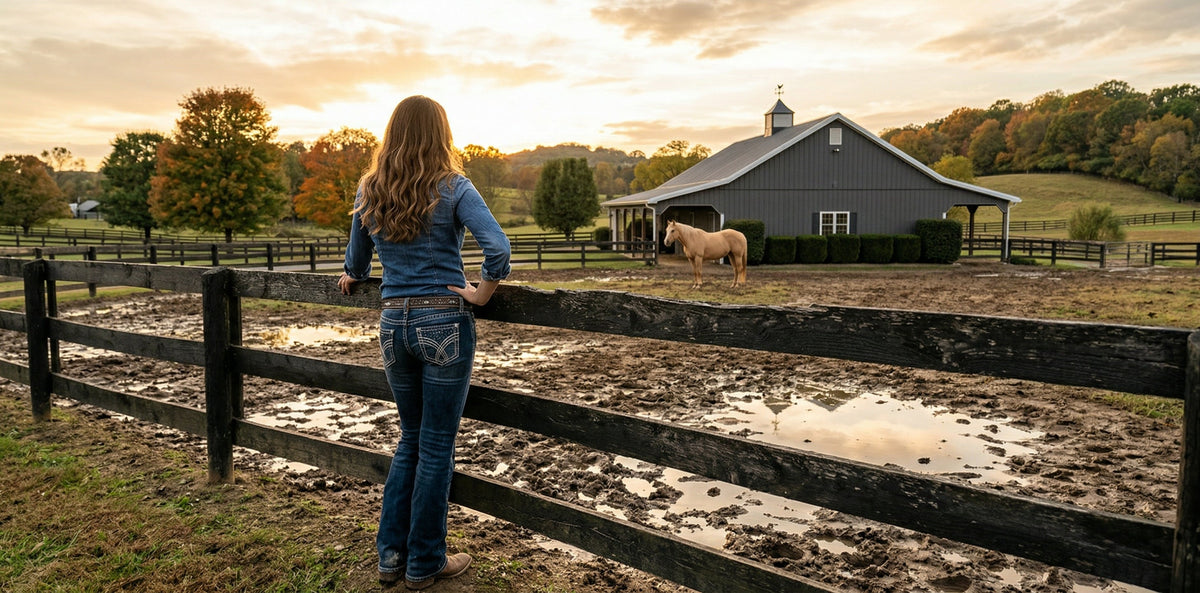
Here's what nobody tells you about mud: it's not a weather problem. It's not a drainage problem. It's not even really a water problem.
Mud is a stability problem.
Water is just the trigger. The real issue is that your horse's hooves are concentrating enormous pressure onto soil that can't hold its structure when it gets wet. The soil churns, mixes with water, and becomes mud. Add manure, add more hoof traffic, add more rain — and the cycle accelerates until you've got ankle-deep soup where solid ground used to be.
I've spent over 15 years helping horse owners solve this problem, and I can tell you that once you understand what's actually happening — and stop chasing the wrong solutions — mud management gets a lot simpler than it appears to be.
This guide covers everything: how to read your property's mud patterns, why most common fixes fail, the system that actually works, specific guidance for tricky situations like slopes and clay soil, and exactly where to start if you're ready to do something about it.
What Mud Management Actually Means
Most mud management advice focuses on a checklist of individual tactics: install gutters, improve drainage, add gravel, rotate pastures, pick up manure. All of those things are genuinely useful. But treating them as separate items on a to-do list misses the bigger picture.
Mud management is the practice of creating permanent, stable footing in the areas of a horse property where horses concentrate their weight and traffic — and managing the surrounding land to keep those areas functional for the long term.
That definition has two parts, and both matter. You need stable footing where horses stand and walk. And you need the rest of your property — pastures, drainage paths, roof runoff — working with that footing rather than against it.
We've discussed each of the key components individually: Drainage. Gravel. Fabric. Sacrifice areas. But on your actual property, all of these things interact. Water flows downhill onto your sacrifice area. Manure sits on top of your gravel. Hooves punch through your fabric. Roof runoff floods your gate area.
The reason most horse owners feel like they've "tried everything" is that they've tried individual tactics without understanding the system. This guide puts the pieces together.
Why Horse Mud Is Different
If you've ever noticed that your horse paddock is muddier than your yard, your garden, or even your neighbor's cow pasture — you're not imagining it.
Horses create mud differently than other animals and differently than simple weather and water accumulation. Here's why:
Concentrated pressure. A 1,000-pound horse standing on four hooves concentrates roughly 185 PSI on the ground — more per square inch than a car tire. When that hoof lands in wet soil, it punches down and displaces material. Multiply that by four hooves, thousands of steps per day, and every horse in the paddock.
Repetitive traffic patterns. Horses are creatures of habit. They walk the same paths to water, stand in the same spots by the gate, pace the same fence lines. This concentrates all that hoof pressure on the same ground, day after day, creating ruts and low spots that trap water and become permanent mud zones.
24/7 exposure. Unlike equipment that drives through and leaves, horses live on the ground they're destroying. They're out there in the rain, standing in the mud they just created, making it worse with every step.
Manure as an accelerant. A single horse produces roughly 50 pounds of manure per day. When that manure mixes with wet soil, it breaks down into fine organic particles that hold water, resist drainage, and make mud stickier, deeper, and harder to manage. University of Minnesota Extension notes that organic material like manure and wasted feed creates more mud and should be removed regularly.
This is why solutions designed for other applications — landscaping grids, driveway materials, general drainage — so often fail in horse environments. They weren't designed for this specific combination of forces.
Understanding Your Mud
Before you spend a dollar on materials, it's worth breaking down what's happening on your property. This isn't complicated, but it's a step most people skip — and it's the reason most first attempts at mud management don't work as well as expected.
Where Mud Forms First (And Why It Matters)
Mud follows hooves, not water. The muddiest spots on your property are almost always the places where horses spend the most time standing and walking — not necessarily the places where the most water collects.
Here's the typical ranking, from worst to (relatively) least bad:
- Shelter entrance. This is the #1 mud zone on most horse properties. Horses congregate at the shelter opening, standing half-in and half-out, shifting their weight back and forth. The roof keeps rain off the inside but concentrates hoof traffic at the threshold. It's the single most impactful area to address first.
- Gate areas. Horses frequently gather at the gate waiting for turnin, feeding, or the sight of you walking toward the barn. The traffic is concentrated in a narrow zone, and gate areas are often at low points where water naturally collects.
- Water troughs. Horses visit multiple times per day, dribble water, and stand around socializing. The ground around the trough gets wet from both above (rain) and from the trough itself (splashing, overflow, dumping when you clean it).
- Feeding areas. Wherever you put hay or feed, horses stand and eat for extended periods. If you're feeding on the ground, wasted hay gets trampled into the soil and decomposes into more mud.
- Barn paths and laneways. The routes horses (and you) walk every day between the barn, paddocks, and pastures. These get compressed into hard-packed trails in dry weather and ruts in wet weather.
- Full sacrifice area / dry lot. The entire space, if horses are confined there for extended periods without adequate footing.
Here's the most important insight: if you can only afford to address one area, start at the top of this list. Fixing the shelter or gate entrance alone can transform your daily experience — and your horse's comfort — more than partially addressing a larger area.
How to Read Water on Your Property
The next time it rains, go stand in your paddock and watch. Seriously. Five minutes of observation during a moderate rain will tell you more about your property's water behavior than any amount of Googling.
You're looking for three things:
Where does water come from? Is it falling directly on the paddock? Running in from uphill? Pouring off a roof? Flowing from a neighbor's property? Each source requires a different response. Roof runoff needs gutters. Uphill flow needs a diversion (berm or swale). Direct rainfall just needs a surface that can handle it (i.e. Lighthoof).
Where does water go? Does it sheet across the surface and leave the paddock? Pool in low spots? Sit everywhere with no obvious exit? A paddock with even a slight slope (2–3%) and a clear exit point for water will behave completely differently than a flat or bowl-shaped one.
Where does water stay? After the rain stops, which areas dry first and which stay wet for days? The spots that stay wet longest are telling you something about either the grade (water can't leave) or the soil (it's so compacted that water can't infiltrate). Both are fixable, but you need to know which one you're dealing with.
The takeaway here is that you don't need to re-engineer your entire property's water flow. Here's the key once you stabilize the ground, water behavior changes. Mud traps water. Stable footing releases it. A surface that sheds water instead of absorbing it solves most of the water issues people blame on "bad drainage."
Pro tip: If you're new to a property — or just haven't noticed before — endure one full mud season before you spend money. Use that time to observe. Photograph the worst spots. Note which areas get bad first and which recover last. That information is worth more than any product recommendation.
Why Your Previous Solutions Failed
If you've already thrown time and money at mud, you're not alone. Most horse owners have tried at least one (and usually several) of these common approaches before landing on something that actually works long-term.
If you've done any of these before (raising my hand!), know that our discussion of why these fail isn't meant to make you feel bad about past decisions. It's meant to save you from headaches — and to help get to the bottom of what the real solution needs to accomplish.
Loose gravel without stabilization. This is the most common approach, and it works... for a while. The problem is physics. There's an old saying in road construction: "50 pounds of stone on top of 50 pounds of mud equals 100 pounds of mud." Without something to hold gravel in place, horse hooves push it sideways and downward. It migrates into the native soil below. Within one to two seasons, you need more. And more. And more.
Wood chips or hog fuel. Inexpensive and initially comfortable, but organic materials decompose — especially in wet environments. As they break down, they actually become mud. They also harbor bacteria and fungi that can cause thrush and other hoof problems. UMN Extension advises against footing materials that readily break down, specifically listing straw, hay, and wood chips.
Geotextile fabric alone. Fabric is an essential component of the system (more on that in a moment), but by itself, it fails in horse environments. Hooves punch through it. Gravel placed on top of fabric without structure migrates off the edges. The fabric gets exposed, flaps in the wind, and becomes a hazard. We hear from horse owners all the time who've had to rip out tangled, destroyed fabric. (For the full story on what fabric does and doesn't do, see our geotextile fabric guide.)
French drains inside the paddock. French drains are great at intercepting water flowing toward your paddock from uphill. They are terrible inside a paddock. Horses crush the pipe, manure clogs the gravel, and the drain stops working within a season or two. French drains belong outside your paddock, on the uphill side. (We cover this in detail in our paddock drainage guide.)
Pea gravel. Round, smooth stones don't interlock. They roll under hooves like marbles. They can't compact into a stable surface. They're miserable to push a wheelbarrow through. And they migrate. There are places in my paddock that I do use pea gravel, but not in my high traffic mud areas. Angular crushed stone with fines is what you need — the fines fill the gaps between larger particles and lock everything together when compacted. (Our complete gravel guide covers exactly what to ask for at the quarry.)
Every one of these approaches addresses one piece of the puzzle but misses the others. Gravel without structure sinks. Structure without fabric lets mud migrate upward. Fabric without structure gets destroyed. The solution is all three, working together.
The Three-Layer System That Actually Works
After 15 years of working with horse owners across every climate and soil type in North America and beyond, we've learned that permanent mud elimination requires three things working together. Miss one, and the system eventually fails.
We call it the three-layer system:
Layer 1: Separation
What it is: A 6 oz non-woven needle-punched geotextile fabric laid directly over your existing ground.
What it does: Keeps gravel from sinking into the native soil below and prevents mud from migrating upward into your footing. This is the separation layer — its only job is to keep the good stuff on top and the bad stuff underneath.
Why it matters: Without separation, any footing material you place will sink into the soil below and disappear. That old road-building truth — 50 lbs of stone on 50 lbs of mud equals 100 lbs of mud — applies directly to your paddock.
The fabric also allows water to pass through while keeping soil particles in place. It's permeable, not waterproof — so that you're not creating a pond.
Key specs: Non-woven, needle-punched, minimum 6 oz weight. Not woven (too slippery), not plastic sheeting (traps water), not thin weed barrier (too flimsy, tears in wind). Overlap seams by at least 18 inches.
(For the full breakdown on fabric types and installation, see our geotextile fabric guide.)
Layer 2: Structure
What it is: A geocell grid system — flexible three-dimensional panels with individual cells that hold gravel in place.
What it does: Prevents lateral movement of gravel under hoof traffic. When a horse steps on stabilized gravel, the cell walls contain the material so it can't be pushed sideways or punched downward. The load gets distributed across a wider area instead of concentrating under the hoof.
Why it matters: This is the layer that's been missing from conventional mud management advice. Extension services and conservation districts recommend fabric + gravel (and they're right that those two components are essential), but without structure, you need 8–12+ inches of gravel to compensate — and even that depth will shift and degrade over time under horse traffic. Penn State Extension specifies a minimum 6-inch compacted support layer plus a 2-inch cushion layer for unstabilized pads - and horse owners with challenging drainage and soil conditions end up having to go much deeper than that.
With structure, you need just 3–4 inches of gravel total. The cells do the work that extra depth would otherwise make up for.
Lighthoof panels are designed specifically for equine use. Each panel is 6' wide x 12' long, with 3" deep cells made from flexible HDPE. They weigh about 24 lbs each, install over existing ground with no excavation, and connect to each other with included zip ties to form a continuous stabilized surface of any size. They've been in use for over 15 years on horse properties across North America.
Layer 3: Surface
What it is: Angular crushed gravel with fines, compacted into the cells to create a smooth, firm, functional surface.
What it does: Provides the actual footing your horse walks on — and the surface you maintain every day. The right gravel compacts into a surface that is firm enough to walk and drive a wheelbarrow on, smooth enough to pick manure from easily, and graded so that water sheets across the top and flows off rather than soaking in and pooling.
Why it matters: The surface layer isn't just "gravel on top." It's a working surface — the part you and your horses interact with every single day. A good surface means easy manure pickup (your manure fork slides right under piles instead of digging into muck), minimal dust in summer, and water that moves off instead of sitting.
Key specs: Angular (not round), crushed (not naturally tumbled), with fines (the powder and small particles that fill gaps between larger pieces). Maximum particle size just under ½ inch — 3/8" minus or ¼" minus is ideal. The angularity and the fines are what allow compaction. Round stone like pea gravel or drain rock can't compact no matter how hard you try.
The shorthand we tell people: angular crushed stone, with fines, max particle size under half-inch. Say that at the quarry and they'll know what you need.
(Our complete gravel guide covers gravel selection in detail, including a script for calling the quarry, a video of what the right gravel looks like, and how much to order.)
Why All Three Layers Matter
Here's what happens when you skip a layer:
| Missing Layer | What Happens |
|---|---|
| No fabric (separation) | Gravel sinks into native soil within 1–2 seasons. You keep adding more and it keeps disappearing. |
| No structure | Gravel shifts laterally under hoof traffic. Surface becomes uneven with ruts and bare spots. Requires 2–3x more gravel depth to compensate, and still degrades over time. |
| No proper gravel | Wrong gravel type won't compact, rolls under hooves, is difficult to clean, traps water instead of shedding it. |
When all three layers work together, you get a surface that stays stable year after year, supports horse traffic and vehicle traffic, drains by shedding water across the surface, and requires minimal maintenance beyond regular manure pickup and an occasional thin top-dressing of fresh gravel every few years.
Situation-by-Situation Guide
Every property is different. Here's how the three-layer system applies to the specific challenges horse owners ask us about most often.
Slopes
If your paddock has a slope, you might think that's a disadvantage. It's actually an advantage — water has somewhere to go.
The challenge on slopes is that loose gravel washes downhill. Rain carries it. Hooves kick it. Gravity does the rest. This is where the structure layer makes the biggest difference: Lighthoof cells hold the gravel in place on the slope so it can't migrate. The surface stays even, and water sheets across it and exits at the bottom without taking your footing material with it.
Slopes steeper than about 15% (roughly a 1-foot rise per 7 feet of run) may need additional attention to surface water management. If water is moving quickly across your surface it can carry away the unsupported gravel over the tops of your cells leaving them fairly bare looking. But for most paddock slopes, the standard three-layer system works without modification.
Clay Soil
Clay is the #1 soil type horse owners worry about, and understandably — clay drains terribly. Water sits on top of it. Hooves churn it into an especially sticky, heavy mud that clings to everything.
Here's the good news: you don't need clay to drain for the three-layer system to work.
The whole point of surface drainage is that water flows across the top of your footing and exits the area without ever needing to percolate into the subsoil. You're building a stable surface on top of the clay, not trying to fix the clay itself.
If your clay paddock is in a low spot where water pools, you may need to address the grading before installing — either by building up the area slightly with additional base material or by creating a surface drainage path (a shallow swale) that gives water an exit route. But the clay itself is not the enemy. Lack of surface stability is the enemy, and the three-layer system handles that regardless of what's underneath.
Inside Shelters and Stalls
The entrance to your run-in shed or shelter is likely the single muddiest spot on your property. Horses stand at the opening for hours — watching the herd, staying out of the rain, shifting in and out. The roof keeps precipitation off the interior but channels all that hoof traffic right to the threshold.
Inside the shelter, the ground stays drier from rain but still gets wet from urine, water carried in on hooves, and condensation. Without stable footing, the interior develops a churned, uneven surface that's uncomfortable and unsanitary.
The ideal setup is Lighthoof installed both inside the shelter and extending outward as a "porch." A full panel extending 12 feet out from the entrance is ideal. Even a half-panel (6 feet) makes a dramatic difference. The porch eliminates the mud zone at the entrance, and the interior stays firm and level.
For freestanding/portable shelters: Install Lighthoof first, fill with gravel, then drive or place the shelter on top. You can drive over filled Lighthoof panels with a truck or tractor.
For built-on-site shelters: Set the posts first, then cut Lighthoof panels to fit around the posts. The cells cut easily with a utility knife.
(For detailed guidance on shelter positioning, gutters, line of sight, and porch sizing, see our run-in shed placement guide.)
Gate Areas and Barn Paths
Gates and paths are narrow, high-traffic zones. Horses stand at the gate waiting. You walk the same path to the barn with and without horses many times a day. The wheelbarrow rolls through the same route every time you pick manure.
These areas often see the worst compaction because the traffic is so concentrated. They're also some of the easiest and most satisfying areas to address — a single panel or two at a gate can eliminate the daily boot-sucking mud experience.
For paths and laneways, Lighthoof panels laid end-to-end create a firm, permanent walkway. One panel is 6' x 12' — two panels side by side give you a 12' x 12' area at a gate, which is usually enough to cover the worst zone.
Drive-Over Areas
If you need to drive a tractor, truck, or trailer across an area that's also part of your paddock — or through a gate that's always muddy — Lighthoof handles vehicle traffic. The panels are rated for it.
Install across the path where vehicles cross. Fill with gravel and compact well. Vehicles can drive directly over filled panels without damaging them.
This is especially useful for the inevitable overlap zones on small properties where the path from the barn to the manure pile crosses through the paddock, or where the trailer needs to pull through a gate area to access a pasture.
Other Animals
Lighthoof isn't limited to horses. We have customers using it with cattle, goats, llamas, alpacas, chickens, and pigs. The installation is the same — fabric, panels, gravel.
Cattle have different behavioral loads than horses, but are heavy and need mud control just as much! Goats and smaller livestock are lighter and create less impact, but they still create mud in confined areas through repeated traffic.
If you have a mixed-species property, the areas where animals congregate (feeders, water, shelter entrances) will benefit from stabilization regardless of which animals use them.
Where to Start: Your Action Plan
You don't have to do your whole property at once. In fact, we recommend against it for most people. Start small, learn the process, and expand from there.
Step 1: Identify Your Worst Spot
Look at the impact zone ranking from earlier in this guide:
- Shelter entrance
- Gate area
- Water trough
- Barn path
- Full sacrifice area
Whichever is causing you the most daily frustration — start there. For most people, that's the shelter entrance or the gate.
Step 2: Start With a 4-Panel Bundle
Four Lighthoof panels with geotextile fabric comes in at under $1,000. That gives you 288 square feet of permanently stabilized ground — enough to cover a shelter entrance with a porch, a gate area, or a water trough zone.
It's enough to prove the concept on your property, learn the installation process, and experience the difference before committing to a larger project.
Step 3: Install in a Weekend
A 4–6 panel project is a comfortable one or two day job for two people. No construction experience needed. No excavation. No heavy equipment. The process is:
- Lay out geotextile fabric over existing ground
- Stretch Lighthoof panels over the fabric and secure with stakes
- Connect panels to each other with included zip ties
- Fill cells with angular crushed gravel
- Compact
- Create a border at any exposed edge (you can also do this before step 1)
That's it. Most people are done and walking on dry ground the same day.
(Our DIY installation guide walks through every step in detail, including how many yards of gravel to order and tools you'll need.)
Step 4: Expand When You're Ready
When you're ready to add more, start at the edge of your existing installation. New panels connect directly to old ones — the zip tie connection is the same whether you're building the initial project or adding to it five years later.
Most people expand in phases over one to three years, working down the impact zone list until they've covered everything that needs it.
Timeline and Planning
Here's a realistic timeline from "I'm ready to order" to "I'm walking on dry ground":
- Panels ship within 1–2 business days from our warehouse in Houston, TX
- Delivery takes 1–5 business days via UPS Ground (12 panels or fewer) or about 6 business days via LTL freight (13+ panels)
- Gravel delivery usually takes next-day to one week from your local quarry — order at the same time as your panels
- Installation runs 30 minutes to 1 hour per panel for two people
Total: roughly 2–3 weeks from order to finished project.
The main timing consideration is frozen ground. If the ground is frozen, you can't stake the panels and they resist stretching in extreme cold. Wet or muddy ground is fine — you're installing over it, not into it. Plan to get your project done before the ground freezes in your area.
(For regional timing windows and detailed shipping information, see our project planning guide.)
The Bigger Picture: Mud Management as Property Management
Stabilizing your high-traffic areas is the most impactful single thing you can do. But it works even better as part of a broader approach to managing your horse property.
Protect Your Pastures With a Sacrifice Area Strategy
The concept is simple: keep horses off your pastures when conditions would cause damage, and provide them with access to a designated area with proper footing instead.
This means pulling horses off grass when it's dormant in winter, when it's too short (below 3 inches), when the ground is saturated, or when pastures need rest in a rotation. The sacrifice area is where they live during those periods.
A sacrifice area with Lighthoof footing isn't such an unpleasant turnout option for your horses temporarily — it's a comfortable, dry, safe outdoor space. And the payoff is pastures that actually recover, grow back thick and green, and provide quality forage when conditions are right.
(Our sacrifice area guide covers sizing, placement, and management in detail. Our 3-inch rule guide explains the grazing science behind when to pull horses off grass.)
Make Manure Management Easier
Here's something nobody mentions in the mud management conversation: a stable, smooth surface makes manure pickup dramatically easier.
On mud, your manure fork digs into the muck. You're scooping mud along with manure. The wheelbarrow gets stuck. The whole process takes three times as long as it should and leaves behind a slurry that makes the mud worse.
On a compacted gravel surface over Lighthoof, your fork slides right under manure piles. You get clean pickup. The wheelbarrow rolls smoothly. What used to be a dreaded slog becomes a quicker and easier chore.
That matters because regular manure removal is the single most important ongoing maintenance task for any horse paddock. Manure left on the surface — even on stabilized footing — will eventually create a "poo-mud" layer on top. The base underneath is still solid, but the surface gets messy. Stay on top of pickup and this doesn't happen.
(Our manure management guide covers storage, composting, and disposal options.)
Think of It as a Property Investment
Well-managed horse properties show better, function better, and are worth more than properties with chronic mud problems. Mud doesn't just affect your daily quality of life — it affects the structural integrity of fencing, buildings, and the land itself.
Clean, dry footing around shelters and barns, green and well-maintained pastures, and organized infrastructure all signal that a property has been cared for thoughtfully. If you ever sell, buyers notice.
Getting Started
If you've read this far, you probably already know which spot on your property you'd tackle first. You've probably been thinking about it for a while.
The good news is that this isn't as complicated — or as expensive — as it might seem. A 4-panel starter project with fabric runs under $1,000. It ships free. It installs in a day with no special tools or skills. And it solves the problem permanently.
We've been doing this for over 15 years, and we've helped thousands of horse owners go from battling mud every season to wondering why they waited so long. We are here to help.
Browse Lighthoof panels and bundles: lighthoof.com/products
Read the installation guide: lighthoof.com/installation
Call or email us with questions: We're horse people, and we genuinely love talking through projects. Reach us at mud@lighthoof.com or 800-279-4716.
Related Guides
This guide is the starting point. For deeper dives into each topic, explore the rest of our content library:
- How to Set Up a Sacrifice Area on Your Horse Property — Sizing, placement, and management
- The Best Gravel for Horse Paddocks — What to order, how much, and what to say at the quarry
- Paddock Drainage: Why Stability Matters More — Surface drainage vs. through-drainage
- The 3-Inch Rule for Horse Pastures — When to pull horses off grass
- Run-In Shed Placement for Horses — Positioning, gutters, and Lighthoof porch setups
- DIY Lighthoof Installation Guide — Step-by-step instructions and tips
- Horse Manure Management — Pickup, storage, composting, and disposal
- Geotextile Fabric for Horse Paddocks — What type to buy and what to avoid
- Planning Your Lighthoof Project — Shipping, timing, and regional planning windows
Frequently Asked Questions
Does Lighthoof work on flat ground with no slope?
Yes. A slight slope helps water exit faster, but Lighthoof works on flat ground too. The compacted gravel surface sheds water laterally rather than absorbing it. If your flat area tends to pool water, creating even a minimal grade (1–2%) during installation — by building up one edge slightly with additional gravel — gives water a direction to flow.
How deep does the mud need to be before I can install?
You can install over existing mud as long as it's less than about ankle-deep. Lighthoof locks in the lay of the land, so any changes you want to make to grading or surface water flow should be done before you put the panels down. If your mud is very deep, you may want to let it dry slightly or add base material to bring the surface up.
Can I install Lighthoof in the rain?
Yes. It's not the most pleasant experience, but wet conditions don't affect the installation. The fabric, panels, and gravel all perform fine when wet. Many people install specifically during the wet season because that's when the frustration peaks and they're motivated.
How long does Lighthoof last?
The HDPE panels are built for decades of use. The gravel surface may need a light top-dressing every 3–5 years depending on traffic, but the panels and fabric are permanent infrastructure.
What about dust in summer?
A compacted gravel surface produces very little dust compared to bare dirt. If dust becomes an issue during extended dry periods, a light sprinkle with a hose settles it quickly. The gravel retains some moisture from its fines content, which naturally suppresses dust.
Can I install Lighthoof myself?
Absolutely. The vast majority of our customers install themselves — often a husband-and-wife team or a few barn friends over a weekend. No construction experience, excavation, or heavy equipment required. Each panel weighs about 24 lbs, and all you need are basic hand tools.


Leave a comment
This site is protected by hCaptcha and the hCaptcha Privacy Policy and Terms of Service apply.